Approach
We are using ChimeraX to visualize phage capsids and determine information about the architecture, including:
- what kind of lattice the proteins use
- the triangulation number (T-number)
- how the proteins fit together
To do this, we as a lab have begun building a piece of Python code currently referred to as auto-lattice. The auto-lattice code works through the initial steps of using ChimeraX to visualize a specific PDB ID. The ultimate goal of auto-lattice is to hand it a PBD ID, and for the code to produce a fully visualized phage capsid structure, complete with snapshots of individual proteins and capsomers.
Following is our process for generating the ChimeraX visualization.
Visualization Protocol
NOTE: our Autolattice capsid_image command will currently perform steps 2-8. See this guide for instructions on installing and running the auto-lattice bundle
- Record pertinent information about the structure, including:
- PDB ID
- Virus Name
- Genome Type (ssDNA, dsDNA, RNA, etc.), currently accepted T-number, number of subunits, host from ViperDB
- Full taxonomy information NCBI taxonomy browser
- Genome length (bp) and the reference that gives the information
-
Protein fold type (HK97-like, single jelly roll, double jelly roll, etc.)
Krupovic and Koonin, 2017](https://doi.org/10.1073/pnas.1621061114) include a table in their Supplemental Information (SI) that identifies the fold type for some specific PDBs, but more importantly, by virus family. If your virus is not on that list, search for “(virus name) protein fold” and search for the paper in which the virus model was published
- Open the structure in ChimeraX
- Command:
open (PDB ID) - This should create open the asymmetric unit, labeled by ChimeraX as model ID 1. If it opens a full capsid or some other assembly, you’ll have to adapt the instructions going forward accordingly.
- Examine the chain information for the number of proteins in the asymmetrical unit, and see if you can determine the Major and Minor proteins
- Command:
- Complete the Icosahedral Assembly
- Verify that in the “(PDB ID) mmCIF Assemblies” table, #1 corresponds to “complete icosahedral assembly”
- Command:
sym #1 assembly 1 copies true - We will be hiding specific proteins in this assembly and may need to translate the lattice, and this option makes each individual protein available for selection.
- Rainbow color the ribbons
- We’ll need this later, but it’s sometimes complicated once surfaces are made, so let’s do it ahead of time
- Use the command
show #2 cartoonsor click “show cartoons” in the Home menu - Use the command
rainbow #2 target cor click “Rainbow” the Molecule Display menu - Use the command
hide #2 cartoonsor click “hide cartoons” in the Home menu
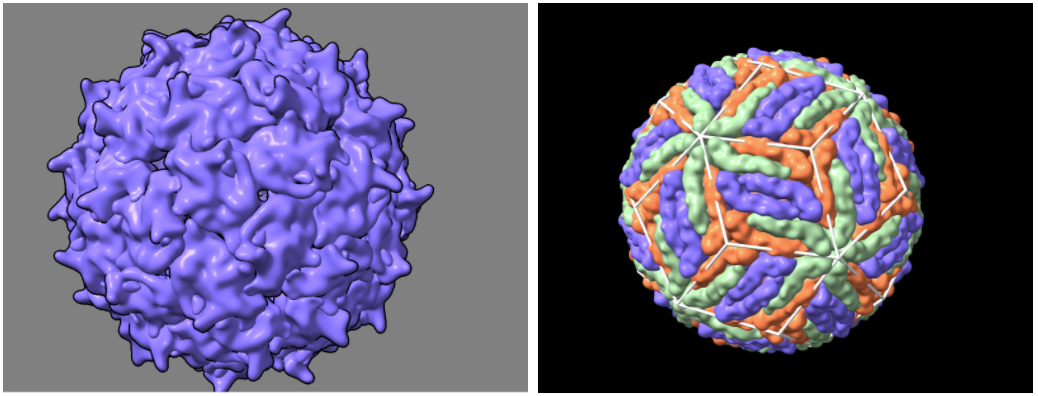
- Create a surface that accentuates the protein/chain boundaries
- Command:
surface #2 resolution (integer >0) level (number 0-1) - Adjust the resolution and level until the smoothness of the protein’s surface looks similar to the images below (start with resolution 15, level 0.3)
- Command:
- Change the background color to white
- Command:
set bgColor whiteor click “white” in the Home menu backgrounds section
- Command:
- Change the color of the structure by chain to a colorblind-friendly palette
- Command:
color /(chain) #(6-digit RGB color picker code) target s - Look up R. Viridis or R. Inferno
- Command:
- Turn on the graphics silhouettes
- Command:
graphics silhouettes trueor click “Silhouettes” in the Graphics menu
- Command:
- Place a lattice on the structure. To redraw the lattice, use the command:
hkcage (h)(k) alpha (lattice) radius (r) orientation (o) spherefactor (sf)\where:- h and k are the distance in capsomers from one pentamer to the next along the principal directions of the lattice
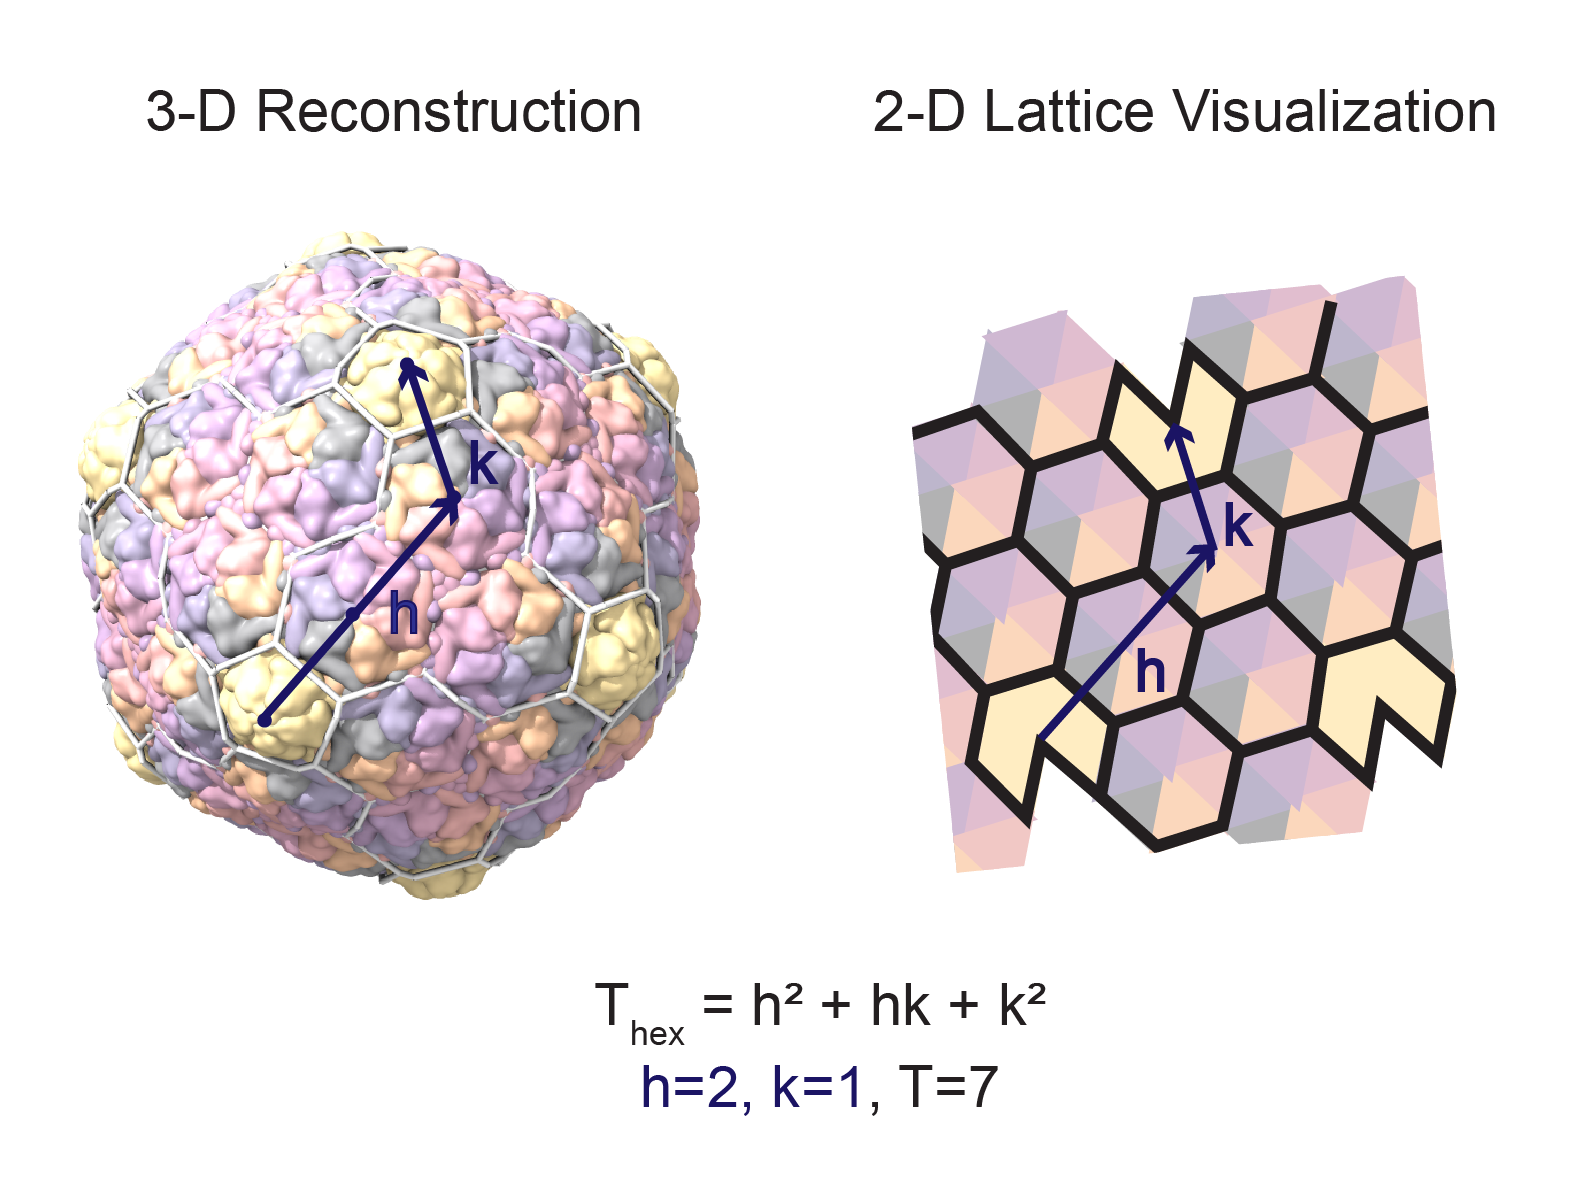
- lattice is one of eight possible lattice configurations: hexagonal, hexagonal-dual, trihex, trihex-dual, rhomb, rhomb-dual, snub, snub-dual)
- r is the radius in angstroms. If you look at the log, you can see what the radius was calculated to be for a good starting point.
- o is the orientation, which must be one of the following values: n25, n25r, 222, 222r, 2n3, 2n3r, 2n5, 2n5r
- sf is the sphere factor of the cage. This is a decimal value from 0 (not spherical at all) to 1 (spherical). The default value is set to 0.3
If your hkcage and your structure are not aligned, here’s how to fix it: - Measure the center mass of your assembly (you need to have used ‘copies true’ for the full icosahedron for this to work) command:
measure center #2 - The center mass of your lattice is at (0,0,0)
- Move the lattice to the assembly one coordinate at a time using the commands:
move x (lattice xcoord value change) coordinateSystem #2 (this is your assembly model #) models #3 (lattice model #)
move y (lattice xcoord value change) coordinateSystem #2 (this is your assembly model #) models #3 (lattice model #)
move z (lattice xcoord value change) coordinateSystem #2 (this is your assembly model #) models #3 (lattice model #)
- Take snapshots
-
Full_surface: a full snapshot of the capsid. Take these snapshots with a clear view of one of the triangular faces of the icosahedron in view, e.g.:
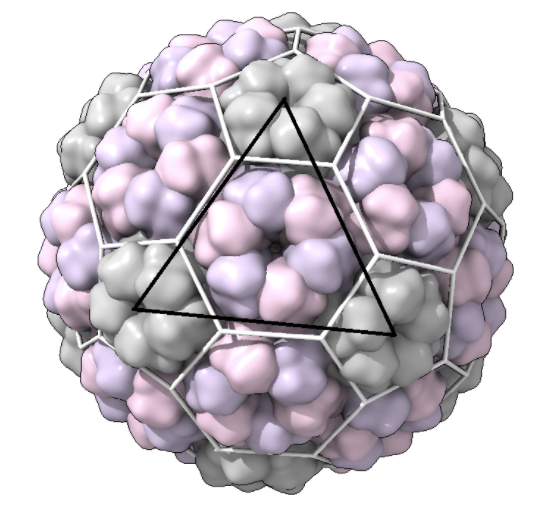
(black line is for emphasis here; this should not be in your snapshot)\
For all of the following capsomer shots, use the Side View in Chimera to remove the backside of the capsid:
 \
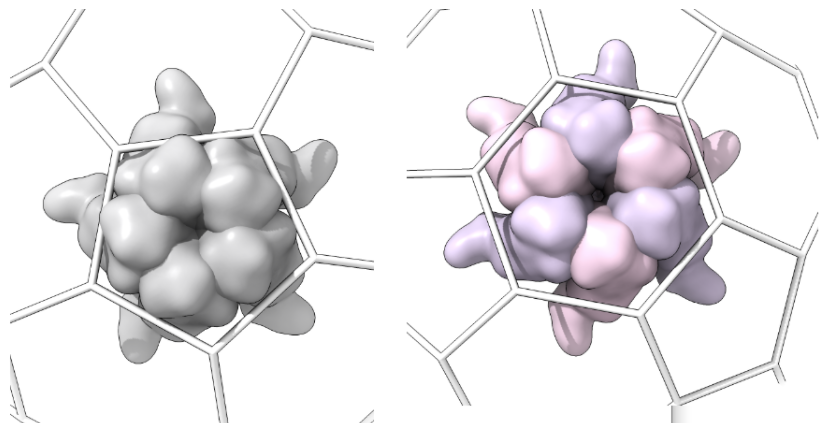
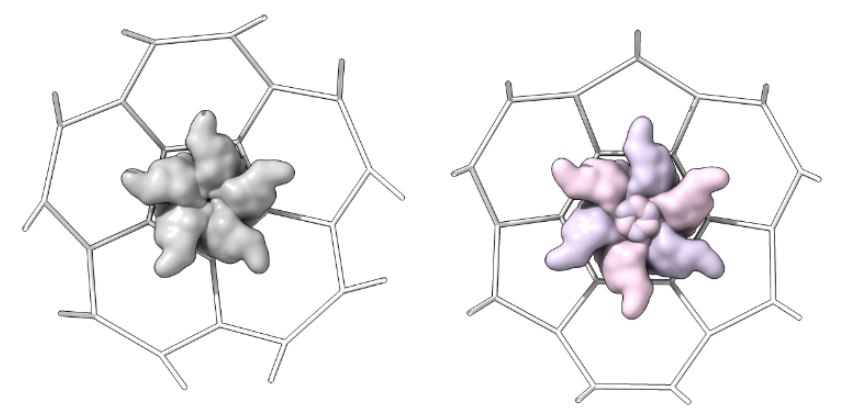
\- Capsomer_unit_outside: For each type of shape in the lattice, centered in the shot. Each lattice type requires a specific number of capsomer shots, as follows:\
- Hexagonal lattices: a pentamer and a hexamer (if T>1)
- Trihexagonal: a pentamer, a hexamer (if T>1), and a trimer
- Rhomb: a pentamer, a hexamer (if T>1), a rhomb, and a trimer
- Snub: a pentamer, a hexamer (if T>1), and a trimer
- Hex dual: a trimer
- Trihex dual: a dimer
- Rhomb dual: a kite
- Snub dual: a floret\ For the hexagonal example above, these would be the shapes we’re looking for:
-
Capsomer_unit_inside: one shot for each type of shape in the lattice from inside the structure as determined above, centered in the shot
-
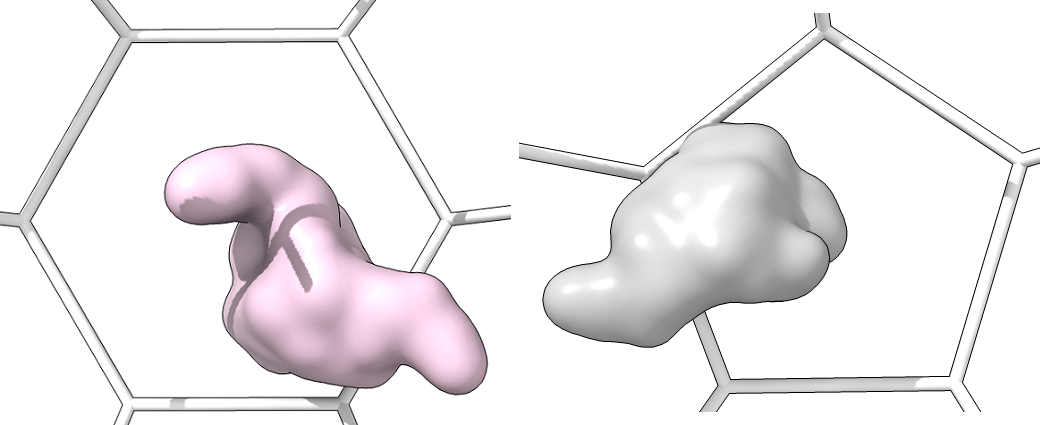
Single_protein_surface_outside: For each type of shape in the lattice, centered in the shot, one shot for each major/minor protein as a surface
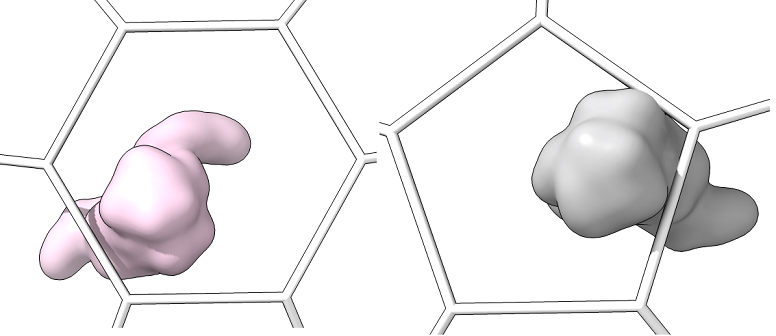
-
Single_protein_surface_inside: For each type of shape in the lattice, centered in the shot, one shot for each major/minor protein as a surface
-
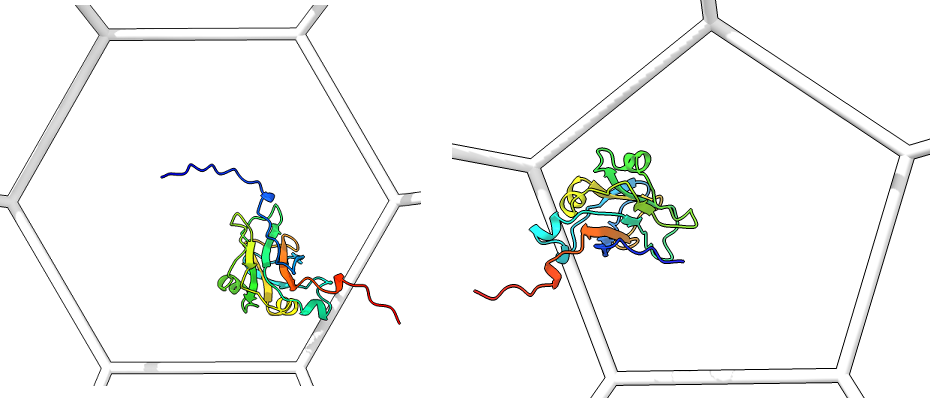
Single_protein_ribbon_outside: For each type of shape in the lattice, centered in the shot, one shot for each major/minor protein
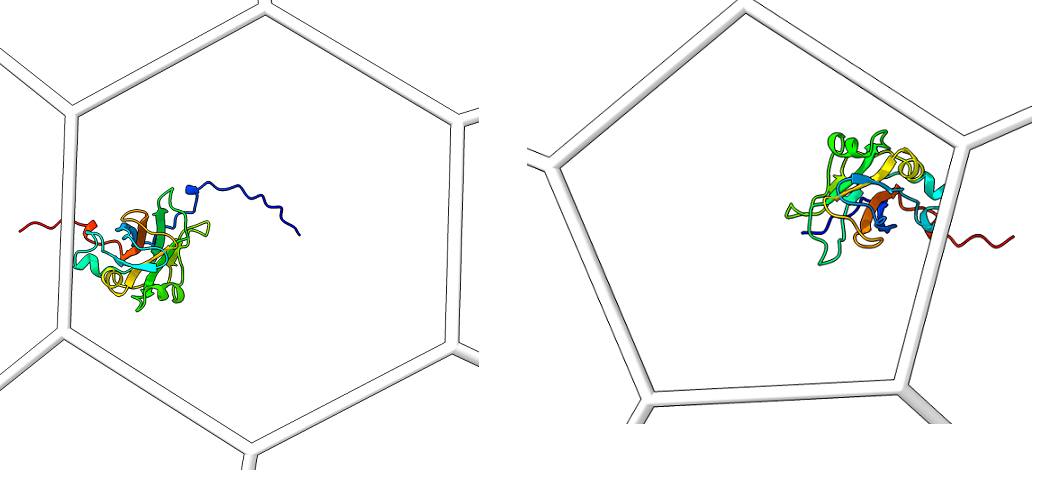
-
Single_protein_ribbon_inside: For each type of shape in the lattice, centered in the shot, one shot for each major/minor protein
-
- Save the Chimera X session
NOTES: * See the original Lattice Identification Protocol for more detailed information